
You’ve seen these badges ![]() while browsing repositories in GitHub. I wondered about them and I discovered that these badges were provided by an app called AppVeyor, and when I continued to search for more, I came across a very simple Continious Integration / Continious Deployment platform. With this post we will prepare a CI Pipeline instance using the simplest capabilities of this platform.
while browsing repositories in GitHub. I wondered about them and I discovered that these badges were provided by an app called AppVeyor, and when I continued to search for more, I came across a very simple Continious Integration / Continious Deployment platform. With this post we will prepare a CI Pipeline instance using the simplest capabilities of this platform.
AppVeyor is a free cloud-based CI / CD platform for open source projects. Travis CI or Circle CI does not require server installation, so you can use GitHub, Bitbucket, TFS and so on. It applies the Pipeline steps that you have built in integration with version control platforms.
Account and Project Creation in AppVeyor
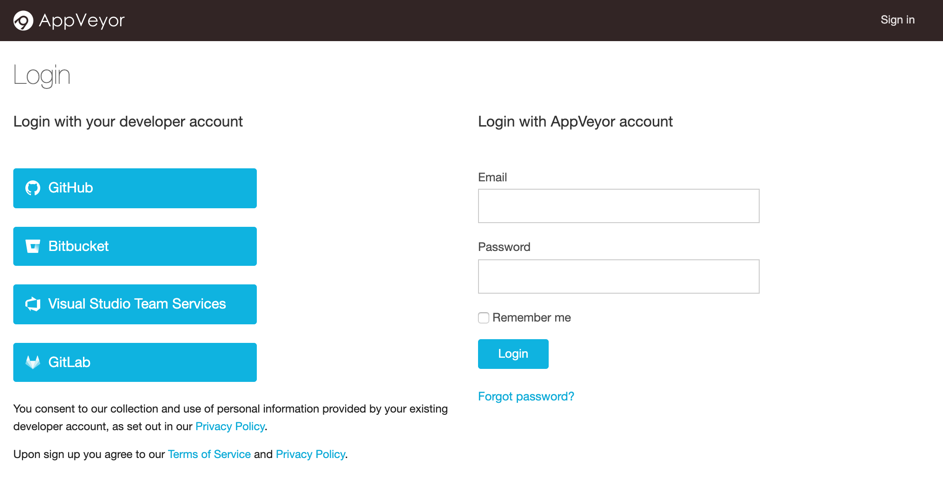
In order to log in after accessing the site, you can log in to the system by authorizing the accounts you have in more than one version control platform or creating an independent account with your e-mail address as you will see in the image below.
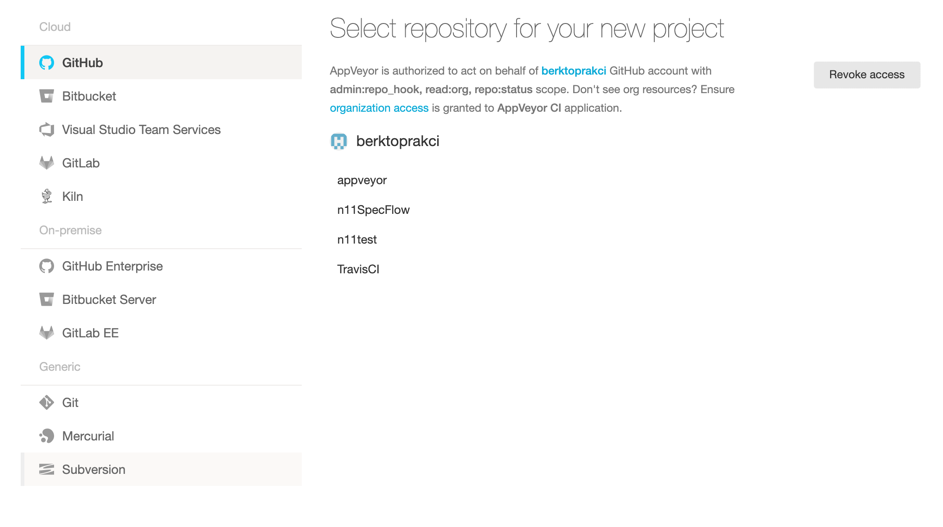
After you click on the “New Project” button to add a new project, you need to integrate your AppVeyor account with the version control tool or platform of the source code you want to access.
AppVeyor gives you access to repositories you manage in the cloud and on-premises platforms, or with tools such as Git, Mercurial, and Subversion. In the image below you can see which tools and platforms you can integrate.
As in the below image, when you press “Add” button to select one of the listed repositories, the new project will be created.
Setup and YAML File
There are two different approaches to configuring AppVeyor. The first one is to determine as if you are using an application from the settings tab with the web interface and the second one is to define the configuration using a YAML file to use the Configuration as Code (CaC) approach. If the second approach is unfamiliar for you, you can do the same with the first solution. Since it is a simpler and shorter method, we will continue with the second approach.
In the YAML file we have prepared, we will specify the configuration of version information to be used in AppVeyor, the Branch to be used, the commands to be applied before the configuration and the project or Solution to be builded.
Since the unit tests in the sample project we use are included in Solution, the tests will run automatically after the configuration and the CI Pipeline will be completed by itself. If your tests are separate from your application, you can use the “after_build” configuration to determine which tests you want to run after the build completed.
AppVeyor automatically starts configuration via Webhook after each Push to Repository.
Now let’s look at the appveyor.yml file we created:
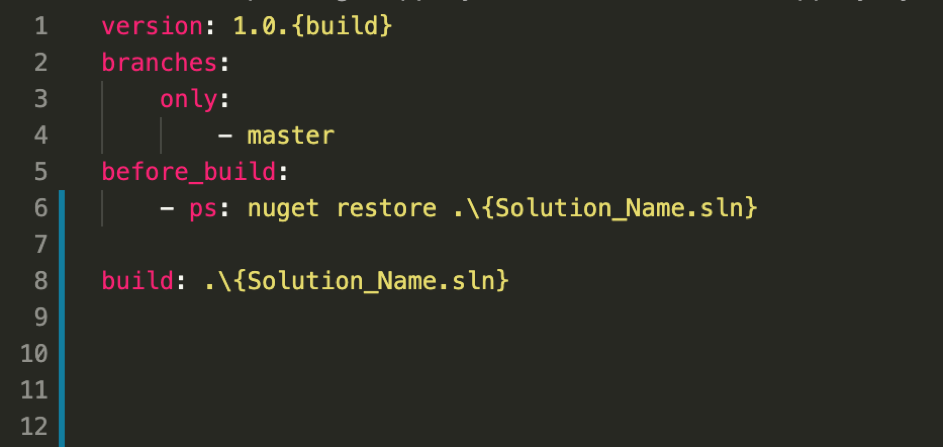
In the first line, we have added “{build}” parameter after 1 and 0 to determine the configuration version, indicating the number of times Build is performed with AppVeyor.
Then, we used the “master” branch in the repository we used, to specify that between the 2nd and 4th lines.
In order to build the dependencies of our application on the 5th and 6th lines before build the solution, we indicated that “nuget restore” command should specify the solution location of the application and also “ps” command in the first place and apply this command with PowerShell.
In the 8th line, we ended the Pipeline by specifying the Solution location we will build.
If you’re wondering what else you can do with the YAML File you can take a look at the reference example.
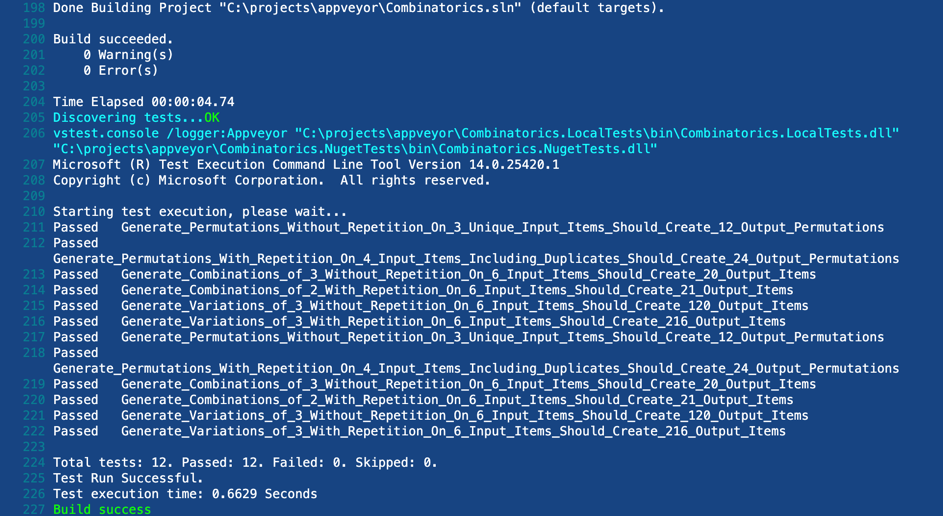
Build Results
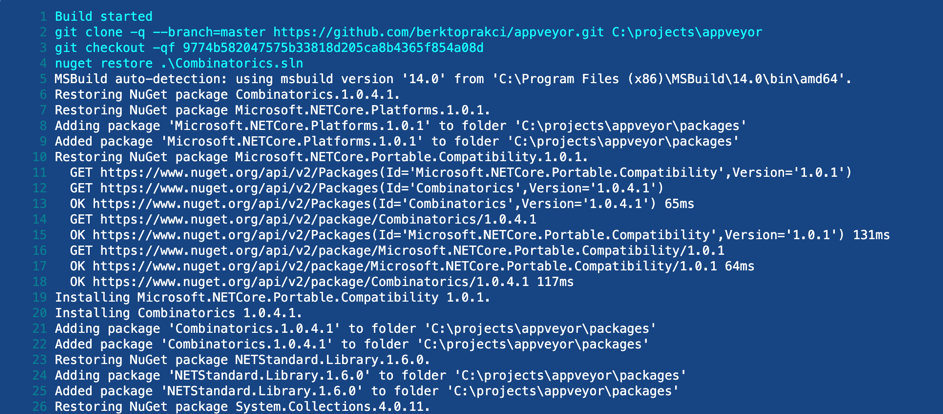
Log records of the build job are shared live via web interface. When you open the “Current Build” tab from the related project, you can follow the process details as of simultaneously.
Start and end images of log records:
[](https://ci.appveyor.com/project/berktoprakci/appveyor)